Welcome!

Thursday, July 23, 2015

Counterfeit Kit Challenge July 2015 Blog Hop!!

I am so excited to take part in the Counterfeit Kit Challenge Blog Hop this month!!  Welcome to my blog!  You should have come here from Leslie's blog, and I hope you have enjoyed all of the amazing projects so far.  If you would like to start from the beginning, you can start at here
 
I was inspired by Challenge #3:  Project Altering Experience - Alter an embellishment to use on your project!
 
I really wanted to use the Jillibean Soup corrugated shapes from my embellishment kit to create something, and originally thought of using the butterfly shapes.  Then, I noticed the little banner pieces.  I would never use these ordinarily, so it struck me that these would be perfect to create into a lovely embellishment to use on a project!  Our neighbors just had a baby, so I decided to make something to embellish a card to celebrate the birth of their new baby boy!  
 
Products used (all from my kit):
 
Jillibean Soup Corrugated Shapes
My Mind's Eye "Follow Your Heart" decorative buttons and twine
October Afternoon Seaside Shape Stickers
Thickers Foam Alphabet Stickers
 

To create the altered embellishments for my card, I layered all the elements on top of the corrugated shapes, starting with the flat stickers, then the foam alphabet stickers, and finally the buttons.  I threaded the buttons with the twine before gluing them.  I also used the small set of white alphas to spell out "welcome" on my card.  Lastly, I glued the banner pieces on top of another piece of twine to make a cute clothesline style banner.  I secured everything with liquid adhesive (PPA matte) for extra strength.

Here is the card I created with my altered embellishments.  I love how it turned out! 


I also created some Project Life style journaling/filler cards, using the woodgrain paper from my kit, which I cut into 3" X 4" pieces.  I used a bunch of very old rub-ons from my stash to create the sentiments.  After transferring the run-ons to my cards, I coated them with a layer of Perfect Paper Adhesive in Matte finish.  This works very well to make sure the old rub-ons do not pull up, and blends in perfectly to the paper.  This adhesive also is completely invisible when dried.  I'm excited to use these cards on my Project Life pages!


Thank you for stopping by my blog on the CKC Blog Hop!  I hope to see you again soon!  Your next stop on the hop is Roxanne's blog, where you can admire her fabulous creations! 

Sunday, July 19, 2015

Welcome Home Banner and good use of scraps!

I wanted to share a recent project I made!  Last month, my daughter returned home from nearly three months in Europe where she studied abroad in Paris and London. As my husband drove her home from the airport, I suddenly had the urge to make her a welcome home banner.  Using some older paper from Pink Paislee "She Art" line, which I got in a paper grab bag some time ago.  I quickly planned out my banner. This line is perfect for my daughter, who is a bit on the hippy side. I cut several triangles out of each sheet of paper, and quickly cut out some large alphas from my old Cricut machine. I knew there was a reason I hesitate to get rid of that machine!! I glued the letters to each triangle, and then taped and stapled the banner pieces to string. It turned out very cute and festive, and I think my daughter appreciated it!


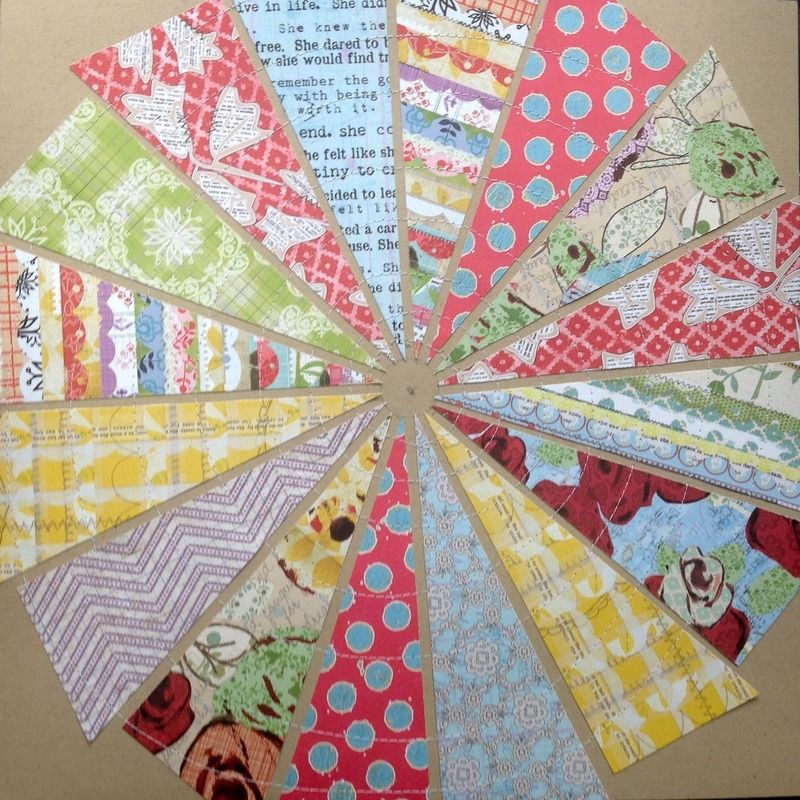
I was left with many oddly shaped triangles of scraps, which I adhered to a sheet of kraft card stock. I then sewed concentric circles of stitching to further secure the triangles down. The result looks like a large pinwheel.  This will make a lovely background for a future page, and was an excellent use of paper and scraps!

Sunday, July 12, 2015

Grid Layout for Camp Scrap!

Here is my second project for May Flaum's Camp Scrap! One of May's "recipes for success" is to use a grid layout. This allows you to fit a bunch of photos onto your page, and looks great in your album, too! I am still working on my 2012 Vacation Album from May's last class, and used photos from a trip to Breckenridge, Colorado Fun Park. This layout came together fairly quickly, but I kept messing with the embellishments and other elements for several days, before finally calling it done!  I used papers from Pink Paislee Declaration line, and some other old embellishments from my stash!


Friday, July 10, 2015

July 2015 Counterfeit Kit


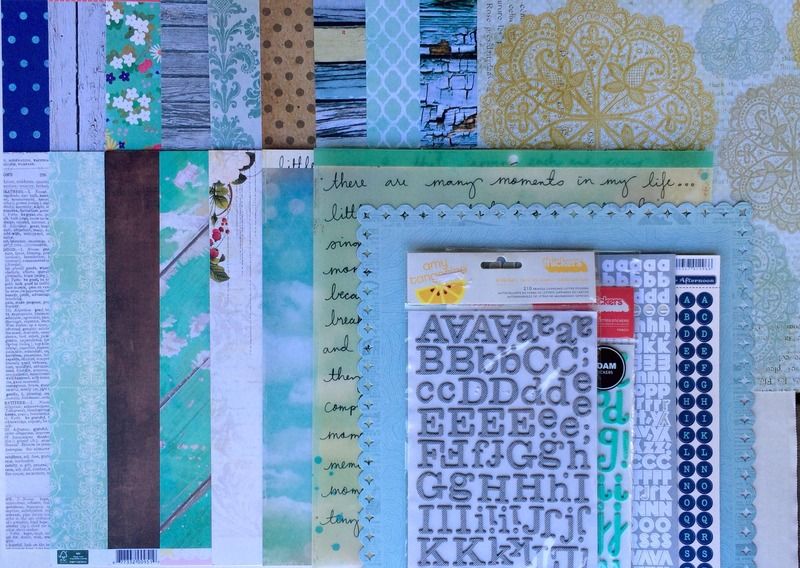
I'm excited to participate in the Counterfeit Kit Club this month!  This is a fantastic way to use up my enormous stash of scrapbook paper and other supplies!  This month's Counterfeit Kit features a kit by Scrapabilly, a German Kit Club (March 2015).  The color palette is monochromatic, with shades of  mint green, teal, cream, navy and brown.  I tried to stick with similar colors are in my kit, although I added a few more playful sheets, with more of a beach theme, and a dash of gold and red for contrast.  I think his will work well with my summer photos.   When searching for papers to use, I was shocked to find how many sheets I actually own of woodgrain papers!!  I added a few extras to create a few of the frames and journaling spots from the inspiration kit.

Paper and Alphas

I used eighteen sheets of paper from my stash including:  Three sheets from Pebbles Lakeside Collection - blue dot, wood grain, and floral, MME Miss Caroline Fiddlesticks "Love" Woodgrain and Fiddlesticks "You and Me" Damask, Crate Paper The Pier Brown Cork Dot, MME Miss Caroline Fiddlesticks "Story" Farmhouse, MME Follow your Heart "Be Amazing" Be Adored, and MME On The Bright Side "Blue Wood", Pink Paislee Butterfly Garden Dew Drops, Pink Paislee Mistables Dictionary Text, Webster's Pages Western Romance Love Letters, Lilac House Weeping Willow, for Crate Paper Flea Market Found, Prima Madeline Collection Parkway, Maggie Holmes for Crate Paper - clouds and handwriting script transparency, Studio Calico Die Cut paper.  I also included four alphas including a blue/white striped Amy Tangerine Everyday, Dear Lizzy Glitter Foam Letters, Basic Grey small white letters, and October Afternoon Peacock Blue Sticky Keys.

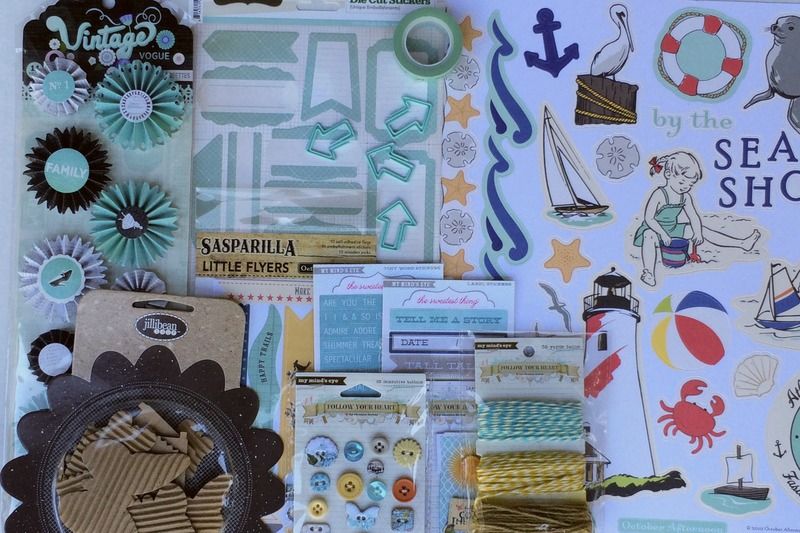
Embellishment Kit
My embellishments include:  Tim Holtz Ideology Chit Chat stickers (not pictured), Pink Paislee Vintage Vogue Rosettes, Jillibean Soup corrugated butterflies, Studio Calico Die Cut Stickers, metal arrow clips, October Afternoon Washi tape, October Afternoon Sasparilla Little Flyers, MME The Sweetest Thing Bluebell "Bright" tiny word stickers and bluebell "Playful" label stickers, MME Follow Your Heart decorative buttons, layered stickers, and twine. October Afternoon Seaside Shape Stickers.

I'm hoping to really put a dent in some of these supplies for my summer photos and scrapbooking!

Sunday, July 5, 2015

Camp Scrap is in session!

I am very excited to participate in Camp Scrap 2015 with May Flaum, my current scrappy girl crush! Camp started on July 1, and I am already very inspired.  I would highly recommend any of May's classes! She's a fun teacher, and has such a no stress approach to papercrafting!

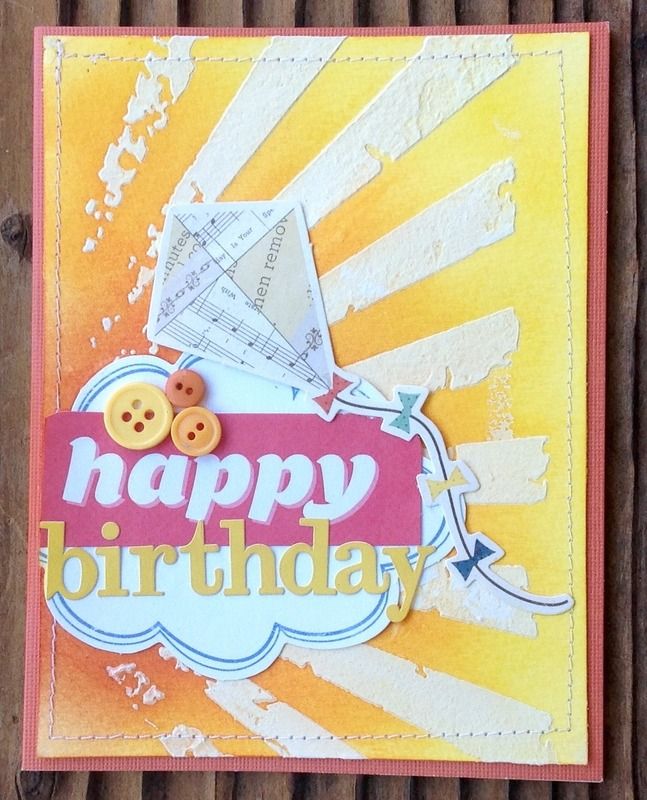
I created this card for the first card lesson.


Without giving away too much, I will tell you I used gesso and the Tim Holtz layering stencil "Rays" to create the background on watercolor paper. When the gesso dried, I created an hombre effect using three colors of distress ink and my blending tool. I then layered the other elements on top.  I like how the color radiates from the center of the sun's rays and embellishment cluster! I seriously love this stencil, and hope to use it on many more projects!

Keep posted for Camp Scrap more projects to come!  You may sign up for a Camp here. http://craftwithmay.com