Welcome!

Monday, March 28, 2011

March Counterfeit Kit Challenge Blog Hop!!

Welcome to the Counterfeit Kit Challenge blog hop! You should have gotten here from Jemma's blog. If not, you can start over at the challenge blog.

This month's challenge is a fun one! "Scraplifting (taken from the Pebbles Blog) is the the act of "lifting" or copying ideas and/or designs from another person’s scrapbook page to use in your own pages. Designs or ideas can be copied in whole or in part. And most importantly be sure to give credit where credit is due. If you do "lift" someone else's idea be sure to mention where the idea originated."

"Mini Challenge #2: Scraplift YOURSELF
Look back at some of your older work. It could be something that you absolutely love or something from long ago that you wish you could have done better. Now your challenge is to make it again, but using your kit."

Personally, I love a good scraplift! It's a fun way to get ideas, and make them your own. The idea of scraplifting ourselves is even better! It's a great way to appreciate our own work in a new way, and look to it for inspiration.

Here is the layout I've chosen to scraplift. I originally got the idea for this layout from Julie Fei-Fan Balzers blog on this post. Her challenge was to make a layout, where you split the page right down the middle, and use items of equal weight on either side of the line. I did cheat a little by placing an embellishment in the bottom right hand corner of the photo.


Here is what I came up with. I even chose to do masking on the background, use buttons, and the "extra" embellishment in the right hand corner of the photo, as I did on my original. They do look similar, but not identical. I encourage anyone to try this type of layout! It feels a little strange at first, but you may be surprised at how you like the end result!


Your next step on the blog hop is Thomisia's blog. Have fun looking at all these fantastic blogs, and please leave some love for everyone if you get the chance! Don't forget to link your projects to the Mr. Linky post on the Counterfeit Kit Challenge blog, for a chance to win some awesome prizes!

Saturday, March 26, 2011

Bethany's Etsy Mini Challenge

Bethany's challenge was to take inspiration from an item you found on Etsy! Etsy is a fantastic site with countless cool vintage and handmade items to choose from. It was really fun browsing!

I chose this kitchy felt calendar wall hanging from 1970 for my inspiration. I was not thrilled by the colors, but I liked the shape of the owls on the piece. I used them as inspiration for the paper piecing on my layout.

Here is my layout. As I was cutting this little guy out, I had so much fun! I realized I just said last month I wasn't crazy about cute paper pieced items, too! I may be a convert!


Sunday, March 20, 2011

Masters of Forgery Introduction

Here are a few fun things we did to introduce ourselves as the new Masters of Forgery at the Counterfeit Kit Challenge blog. I chose to make my collage like one of the I Spy pictures from the books my kids have. It was really fun to do, and would be a great scrapbook page!

I Spy game:

1. Find my picture.

2. Find photos of my hubby, my daughter, and my three sons.

3. Find the state I live in.

4. Find the first and last letters of my name.

5. Find eleven stars, representing the eleven MASTERS OF FORGERY.

6. Find our newest family pet.

7. Find the two pictures of my 2nd son's favorite sport.

8. Find something you would wear to our favorite place to visit in the summer.

9. Find the instrument my hubby and kids play.

10. Find one popular building toy that my son's love to play with.

11. Find two common childhood fears.

12. Find 13 (or more) rhinestones.

13. Find 12 flowers.

14. Find the largest living land mammal.

15. Find the largest living sea mammal.

Word Game:

I chose the word: COPYCAT

C - Cosmo Cricket

O - October Afternoon

P - Pink Paislee

Y - Little Yellow Bicycle (this was a bit of a stretch!)

C - Creating

A - Adhesive

T - Tim Holtz

Tuesday, March 15, 2011

I'm so excited to be a Master of Forgery!!!!

After sending in my application on the LAST day of the call, I really thought there was no chance of getting picked for the Counterfeit Kit Challenge design team. The level of talent participating in the challenge is astounding, and I honestly was not holding my breath. So, when I received the e-mail, I was completely surprised and thrilled!!! Thanks so much to Meridy and Bethany for creating such an awesome challenge, and for allowing me the opportunity to be a part of it! For all of those who applied, you are all winners in my eyes!

Here is the complete list of the team and their blogs:

Sunday, March 13, 2011

"Sunny Clearing" Counterfeit Kit

The original "Sunny Clearing" add-on by Studio Calico:

My counterfeit "Sunny Clearing" kit:

I know I'm going out of order with my add-ons, but I was very inspired to complete this kit! That was a bit of a surprise, considering I'm not a huge fan of yellow. But as I started putting this one together, I had so much fun, and it just made me so happy! In my opinion, the kit just screams SPRING and FUN!

The only thing I regret not having, or being able to make was the crocheted flowers. I think I need to teach myself to make those!

Supplies:

Patterned papers - Echo Park (Sweet Summertime - Sunny Spots), Bo Bunny (Block Party - Fireworks reverse side), Bo Bunny (Sun Kissed Skies), My Mind's Eye (How Sweet It Is - Yummy Stripes), My Mind's Eye (Jack and Jill "Cute" Beautiful Blooms).

Embellishments - Alphabets (Pink Paislee fashion script), MME (Jack and Jill "Cute"), Yellow Butterfly stickers (Jenni Bowlin), hand painted doily, pressed petals daisies, handmade button clips, October Afternoon wild cards (Fly a Kite), various journaling spots from stash (Cosmo Cricket, Scribble Scrabble), chipboard doilies (Crate Restoration, GCD), yellow checked ruffle ribbon from stash, and Shimmerz (sunny).

Thursday, March 10, 2011

Crackle paint wood grain technique

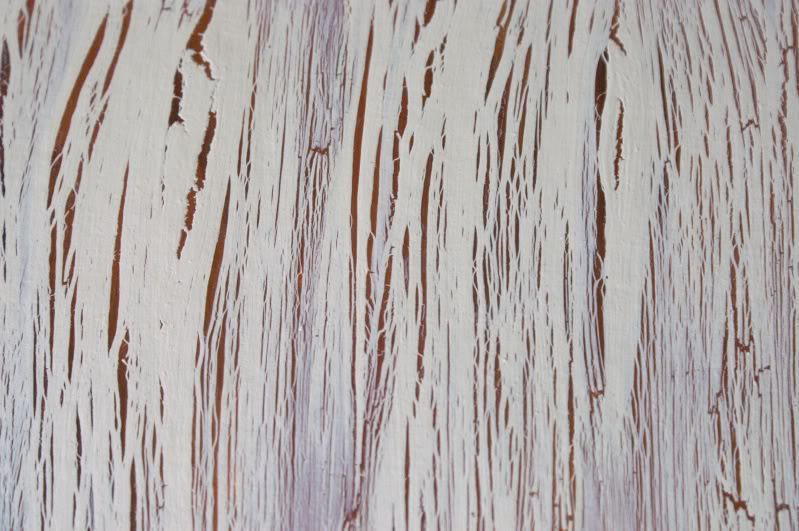
One of my favorite altered art techniques is the Elmer's glue crackled paint technique! This will give you a very distinctive old wood look that makes a gorgeous base for a scrapbook page, or altered art piece.

I thought it would be a great way to create your own wood grain paper for the Counterfeit Kit Challenge, since there is a sheet of wood grain paper in the main kit by Studio Calico.

Start off by getting all of your supplies together for this technique. You are going to need a sturdy surface to work on. You can use heavy cardstock, foam board, cardboard, and my favorite, a big side from a used Priority mailer! You will also need paint brushes, gesso (to prepare your paper or board for this process), several colors of acrylic paints, a heat tool, and Elmers white glue. You may want a paper plate or old tray for your Gesso and paint to make them easier to apply. It would be a good idea to cover the area where you plan on working, because this can get a little messy. Also, I would recommend reading through the instructions once before you start! We are going to take this step by step.

Step #1:
Apply a layer of gesso to your surface. I am using the opposite side of a used Priority mailer. Don't worry about making the edges even, we will do that at the end. I did not go all the way to the edge of my surface, because I planned on cutting it down to smaller than 12 X 12. If you want a larger finished size, take your gesso and paint all the way to the edge. Allow the gesso to dry completely.

Step #2:
Apply a base coat of acrylic paint. I chose three different colors of brown for my base, because I was going for an aged wood look. I applied the paint in vertical strokes to further simulate the look of wood. You can use an colors you wish, but I would recommend that the base coat and top coat have a lot of variation. In other words, if your bottom layer is dark, make the top layer light, or do the reverse. Also, contrasting colors would work. This layer is going to show through the top layer, and that's why the variation is important. Allow this layer to dry completely.

Step #3:
(Note: Have your paint for the next step ready to go, because you are will apply the paint over the glue while it is still wet!) Apply a generous layer of glue over your DRY paint. Squirt it directly out of the bottle and cover the entire surface. Then, spread the glue out with your paint brush. It does not have to be perfectly even, because the variations in thickness add to the crackle effect. Immediately go to Step #4, while the glue is still wet!


Step #4:
Apply a top layer of acrylic paint to the WET glue. I used a tan colored acrylic paint for my old wood effect. This layer of acrylic should be thinned down with water to the consistency of Hershey's chocolate syrup (the kind in the can). Prepare your paint before you do Step #3, and have it ready to go before the glue layer dries. This is crucial to get this effect to crackle properly! When you apply your paint, try not to press too hard, you don't want your paint to mix with the glue, you just want to have it glide right over the top. At this point, you can go immediately to Step #5 if you have a heat tool, or allow the paint to dry naturally.

Step #5:
Heat the painted surface with your heat tool to speed up the crackle effect. Hold the tool at least 6" to 8" away from the surface and keep moving your tool, or you can bubble the paint (I've done this!). You will begin to see small crackles appear in the surface. It is really fun to watch. After a few minutes, allow your project to dry completely.


Step #6:
After the surface dries completely, you should see many lines and cracks that have formed all over the top layer of paint. I love this effect! If no cracks have appeared, you may have missed a step. Don't give up! Keep trying until you get it to work, it is so worth it!!! At this point, you will want to cut down your board to the desired size. I used my Basic Grey mat, metal ruler, and an exacto knife.

Posted Image

The Final Project:
I did this layout in an 8" X 8" size, using one of my favorite photos of one of my sons. The little owl was made by tracing out an owl chipboard shape onto the cardboard, then peeling the top layer away, and inking the edges. I used brads for the eyes! It really makes a beautiful page or framed art piece! I hope you give this technique a try!

Wednesday, March 9, 2011

March Counterfeit Kit!!

I was so excited to see this month's Counterfeit Kit inspiration! Studio Calico is one of the most popular clubs out there, and it's easy to see why! I had so much fun making my version of the kit! I decided to go with the theme and flavor of the kit, rather than copy it piece by piece.

I started out with cardstock, and lots of it! I've run out the past few months, so included two sheets each of brown, soft green, kraft, orange, cream, and teal. I went with orange instead of gold, because my kit had no yellow.

I was lucky enough to have an old sheet of wood grain paper by October Afternoon in my stash, and that's the first piece I pulled. The rest was a matter of riffling through every sheet of paper in my stash!! It was messy, but I think I came up with a kit that reflects my taste and style. Since three of my kids are boys, I was happy to make a kit with more masculine potential. I gave my kit a punch of color with the embellishments. I plan on trying to make a paper pieced mushroom, and print out a bee from one of the fabulous sources on the Counterfeit Kit Challenge blog.

Papers by Fancy Pants (Road Show), My Mind's Eye (Little Boy Blue), Pink Paislee (Fetching), October Afternoon (Fly a Kite, Thrift Shop, Weathervane, County Fair), and Little Yellow Bicycle.

Embellishments: Journaling spots (Scenic Route), phrase cards (Scribble Scrabble), alphabets (Thickers, Jillibean Soup), chipboard tree (Maya Road), Buttons (Bo Bunny), kraft stars cut with Cricut George cartridge), and faux wood strip (backing to sticker package Imaginisce).

Saturday, March 5, 2011

In loving memory of our beloved Violet

February 16, 1998 - March 5, 2011
Photo courtesy of Isaac Hernandez

Tuesday, March 1, 2011

It's All in the Numbers!

Tallying up all my statistics for the February Counterfeit Kit Challenge was fun, but it left me feeling like I could have done so much more with my kit! I was really impressed by the incredible numbers put out by some of you! I've never been a super fast scrapper, and I also had knee surgery this month, so it was a struggle to get more accomplished.

Here are my statistics:

  • # of layouts completed - 3
  • # of two pagers completed - 0
  • # of cards - 2
  • # of Valentines - 1 (?)
  • The year of the oldest supply you used: The Basic Grey paper was from 2008, but the earring was at least 15 years old!
  • Total $ spent putting kit together - $1 + tax. Thinking about it, I realized I spent money on the supplies ORIGINALLY, but I guess the point is since we're shopping our stash, it's FREE! That's my story, and I'm sticking to it!
  • # of photos used - 2

I hope my totals next month are much more impressive!! All in all, I'm happy with what I accomplished. Since my totals were lumped together with Meridy and Bethany's, they look much more awesome! Those girls can scrap!

Here is what I started with:

This is what is leftover from my kit:

The cardstock is almost completely gone, as I only included four sheets with my kit. There are no full sheets of patterned paper left, and many very small scraps. I'm sure I could do a few more layouts with what I have left, if I had more time. I hardly used any of the flowers and ribbon I included in my kit, which surprised me! I'll keep that in mind next month when I make up my kit. I made a pretty good dent in the rest of the embellishments, though.